inkAID Transfer Film and Transferiez Image Transfer Medium
inkAID Transfer Film and inkAID Transferiez Image Transfer Medium are used in the process of transferring inkjet printed images onto other materials.
Receive the FREE inkAID Image Transfer Quick Reference Guide including images you start transferring!
Scroll down to the product pages to place your order.
You’ll need an inkjet printer using pigment inks for the inkAID Image Transfer Process. Complete instructions can be found by scrolling down and clicking on the four grey boxes with the “+” symbols.
Watch how inkjet printed images are transferred onto various substrates on the Instructional Videos Page.
- 1 of 1
The inkAID image transfer process allows you to take your fine art and digital mixed media prints to the next level. Images can be transferred to almost any material: paper, fabric, canvas, metal, wood, ceramics, glass and tile, to name but a few. You can combine image transfers with other mediums such as encaustic wax, acrylic and oil paint, or other grounds or coatings. You can also layer image transfers on top of one another creating a three-dimensional effect.
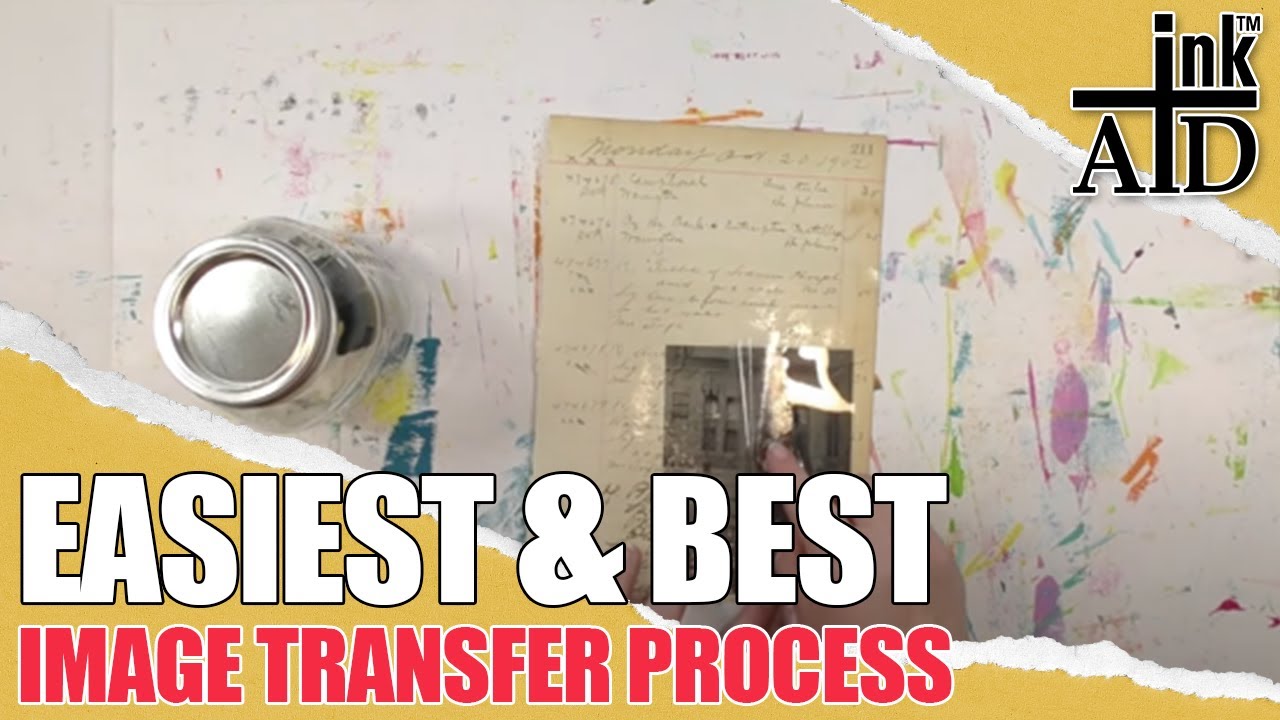
The inkAID image transfer process begins with printing your image onto the clear inkAID Transfer Film. The printed image is then transferred to the receiving material (sometimes referred to as the "surface" or "substrate") by first coating the material with inkAID Transferiez™ solution, or "transfer medium", and then placing the printed film, print side down, onto the coated surface. After pressing the film into the material and waiting several minutes, the film is then carefully peeled off leaving the printed image on the receiving material. It's a fairly straight forward and easy process.
Preparing the Transferiez™ Image Transfer Medium Solution
CAREFULLY READ AND FOLLOW THE INSTRUCTIONS ON THE LABEL OF THE Transferiez™ Image Transfer Medium Concentrate container. It is recommended that the solution be prepared and stored in a tall "Ball" glass canning jar with sealing lid and tight fitting sealing ring. Pour 4 ounces of 91% isopropyl alcohol into the jar followed immediately by 1 tablespoon of Transferiez™ Image Transfer Medium Concentrate on top of the alcohol. The order of addition is very important. There is no substitution for 91% isopropyl alcohol. See the "note" below.
Cover the top of the jar with a small Ziplock sandwich bag, using both layers of plastic. Place the sealing lid on and then securely tighten the sealing ring. Shake the jar well a few times over the next several hours until the solution appears clear. The solution will take about 4 hours or overnight to mix completely. Do not open the jar until the solution is completely clear.
The Transferiez™ Image Transfer Medium Solution is usually applied using a foam brush. Most users leave the foam brush in the jar until all of the solution is used. Only prepare enough solution to use over two or three days. If the solution becomes cloudy or thick discard it according to the label directions and prepare new solution.
IMPORTANT! Isopropyl alcohol and the Transferiez™ Image Transfer Medium Solution are flammable. Keep away from open flame or any source of ignition. Use isopropyl alcohol and the Transferiez™ Image Transfer Medium Solution in a well ventilated area. Never pour the Transferiez™ Image Transfer Medium Solution into a drain. It will clog the drain pipe. Dispose of the prepared solution according to the Transferiez™ Image Transfer Medium Concentrate label directions.
Note: 91% isopropyl alcohol is available in the United States in most drugstores and Walmart or Target stores.
Outside of the United States, you can prepare 91% isopropyl alcohol by mixing other readily available concentrations of isopropyl alcohol in your area.
Prepare 4 ounces of 91% isopropyl alcohol by mixing together 99% alcohol with 70% alcohol in the following proportions:
85.5 mls (2.89 fluid ounces) of 99% isopropyl alcohol with 32.794 mls (1.11 fluid ounces) of 70% isopropyl alcohol.
You can also prepare 4 ounces of 91% isopropyl alcohol by mixing together 99.5% alcohol with 90% alcohol in the following proportions:
13 mls (0.44 fluid ounces) of 99.5% isopropyl alcohol with 105.294 mls (3.6 fluid ounces) of 90% isopropyl alcohol.
Printing inkAID Transfer Inkjet Film
inkAID Transfer Film is a clear mylar film which is coated on one side with a water based ink jet receptive coating. inkAID Transfer film sheets are packaged in a plastic sleeve with a label that says "Image This Side". inkAID Transfer Film rolls are wound coated side out. You can tell which side is coated by lightly pressing a wet finger on one corner of the sheet. The coated side will be "sticky".
The ink jet receptive coating on inkAID Transfer Film is designed to dissolve when it come into contact with the Transferiez™ Image Transfer Medium Solution on the receiving material. Other commercial clear ink jet films will not work in this process.
You must have a printer that is using pigment based inks for this process. Dye based inks will not work. Check the specifications of your printer to determine what type of ink it uses.
Select a printer setting that includes a "matte" or "luster" media setting. Try a few different settings to see which is best for your work.
When preparing the image for printing, either "mirror" the image or flip it horizontally (back to front) so that the transferred image looks exactly like the original image. This is especially important when your work includes text in the image.
Allow the printed film to dry for at least 4 hours, or preferably overnight in a cool, dry environment. Printed film that has dried can be stored for months before using.
Depending on your preference, you may wish rub out the ink around the edge of the image on the transfer film with a cloth and water. This may help to release the transferred image on the edges when you lift the transfer film. Modifying the edges of the image also provides a completed transfer that has a "softer" edge.
Preparing the Image Receiving Material (Substrate)
It's recommended to place a rigid polypropylene or other plastic sheet down on your work table to do your transfers. The inkAID Carrying Sheets work well for this purpose.
Clean porous materials like fabric or canvas with a tape lint remover. Make sure papers are clean and free of any loose debris or fibers. This also applies to non-porous materials like plastic and wood.
Metals must be thoroughly cleaned of all processing oils and grease. This can be done by cleaning with hot water and Dawn dish washing soap. Wash the surface of the metal twice and rinse thoroughly. After drying you can follow with 91% isopropyl alcohol or a solution of 1/3 white vinegar to 2/3 water. Wipe off and let dry thoroughly before using.
Keep your fingers off of the cleaned metal. Fingerprints will show up later in the finished image.
Some users like to roughen the surface of the metal slightly by using a Scotch Brite or similar cleaning pad. This may provide improved adhesion of the image during the transfer process.
You may want to secure the image receiving material to keep it from slipping by taping it down to your work surface. For metals, a couple of pieces of rolled tape on the back usually work well. For fabrics and paper you can secure the top with a low tack, good quality, painters tape like Frog Tape.
Applying the Transferiez™ Image Transfer Medium Solution
The Transferiez™ Image Transfer Medium Solution is usually applied using a foam brush.
When applying the transfer solution work quickly, but carefully, to completely cover the surface. This is especially important when creating large transfers, as the alcohol will evaporate quickly and the solution must be uniformly wet over the entire surface of the receiving material when the printed film is laid down. Make sure the surface is wet, but not flowing. Metals require less transfer solution than fabrics and papers.
Practice with a few small images to get "a feel" for how much transfer solution you need.
Place the foam brush back in the jar and cover the jar promptly to minimize evaporation of the alcohol.
Completing the Image Transfer
Carefully place the printed film, print side down, onto the coated material.
To minimize bubbles, start from one edge and "roll" the film onto the receiving material.
Then lightly press with your hands from the center out to flatten the transfer film so that it's touching the entire surface of the material. Now start your timer.
Continue using other tools such as rollers or a catalyst to press the film into the transfer solution and the receiving material.
More pressure can be used with porous materials like fabric and paper because the image is being set into the material.
Non-porous materials like metal and plastic require a lighter touch. Carefully press the image onto the surface with a foam roller to keep the image intact. Pressing too hard may cause the image to move and smear.
It is recommended that you watch the instructional videos to see the actual process being done.
Wait several minutes before removing the film. Keep careful track of the time.
For porous materials leave the film in place for a total time of about 3 to 4 minutes.
For non-porous materials leave the film in place for a total time of about 3 minutes. The ink starts to release from the transfer film faster on nonporous materials.
You should never have to leave the printed transfer film on the receiving material longer than 4 minutes.
Again, practice your technique on several small pieces to become familiar with the image receiving materials you're working with and the temperature and humidity of your work environment.
To remove the transfer film begin by lifting one corner and then carefully lift it across the top. Slowly, but carefully, roll back the transfer film off of the image receiving material in one continuous motion, lightly pressing on the film as you remove it. (When you view the instructional videos you will see how this is done).
When rolling the film back on non-porous materials, especially metals, be careful not to use too much pressure as this may cause the ink to move around a bit. Practice to get a feel for the correct amount of pressure required.
After completing the image transfer carefully put it aside on a piece of plastic to dry overnight.
After drying it will be very water resistant and will have some level of abrasion resistance.
If desired, you can top coat the image with a water based acrylic top coating such as Golden Polymer Varnish or solvent based Krylon Gallery Series™ UV Archival Varnish.
Some Helpful Tips
If some of the transferred image remains on the film then wait slightly longer the next time. Remember, you should never have to leave the printed transfer film on the receiving material longer than 4 minutes. Also make sure you have pressed the printed film into the receiving material.
Occasionally air bubbles become trapped under the printed film once it has been laid on the image receiving material, they are uncommon but can occur more frequently on nonporous materials. To minimize or eliminate the possibly of air bubbles (a lifting of the image off of the receiving material) it's important to remove the film in a careful, controlled manner using the right amount of pressure. If an air bubble does occur you can pop it with a pin and the image will settle back down onto the receiving material.
For large images transfers it’s helpful to wind the printed film, print side out, on a 4 inch cardboard tube. Leave plenty of unprinted margin on the film so that you can secure one end of the film to your work surface. You can then carefully roll the printed film onto the receiving material in a controlled manner.
You can clean up any spilled transfer solution using 91% isopropyl alcohol of Clorox or Lysol wipes.
Addendum
What you will need for the inkAID image transfer process.
- inkAID Transferiez™ Image Transfer Medium Concentrate
Important Tip - Read the instructions on the container label carefully. Do not clean this solution up with water, only alcohol. Do not dump left over solution down the drain, it will clog.
It's a good practice to leave the foam brush in the jar with the solution. Discard the brush after using the batch of Transferiez™ Image Transfer Solution.
- inkAID Transfer Film
- Jars: Kerr Wide Mouth Mason or Ball Wide Mouth jars - these are glass canning jars. You can find then at Walmart, Target or on Amazon.com.
- Polyurethane or other Rigid Plastic Sheet: surface for table protection.
- Wipes: Clorox or Lysol
- 3 inch wide foam brush: Home Depot, Lowes or hardware and paint stores.
Buy a good quality foam brush that will last for through the use of the prepared batch of Transferiez™ Image Transfer Solution and won’t break apart. Use a new brush on a new batch of transfer solution.
- Catalyst W-06 from Princeton Artist Brush Co.
- Other tools suggestions: foam roller, brayer, small terry cloth towel pieces.
Ideas for Material (Substrates) to Transfer to and Sources:
Metal Mesh and Copper Mesh - TWP Inc www.twpinc.com
80 Mesh Copper .0055" Wire Dia. (Square Foot 100 Mesh Brass .0045" Wire Dia. (Square Foot)
Copper Metal 10 mil: - Nimrod Copper Co. www.nimrodcopper.com
Aluminum - Ultra-Corrosion-Resitant 1100 Aluminum—.010” Thick, 24” wide, 50’ long http://www.mcmaster.com/#9060k71/=zbmo23
Fabrics - Jo-Ann Fabrics - www.JoAnn.com or your local fabric stores. Quilt stores also have nicely woven fabrics for both printing and transfers.
Canvas- Fredrix Unprimed Canvas
Plywood - 1/4 " Home Depot, Lowes or your local lumber yard
inkAID Transferiez™ Concentrate is an image transfer medium used to transfer images from inkAID Transfer Film to paper, metal, fabric, wood, tile, glass, plastic, and leather.
The images printed on inkAID Transfer Film MUST be printed with pigment based inks. Check your printer specifications to determine if all the colors use pigment based inks.
After drying, the finished image transfer has excellent flexibility and chemical, water, and UV resistance. Water based top coatings can be applied over the finished transfer to provide enhanced protection.
inkAID Transferiez Concentrate is first mixed with 91% Isopropyl Alcohol to prepare the image transfer solution. To prepare the solution pour 4 fluid ounces of 91% Isopropyl Alcohol into a glass jar with a tight fitting, leak proof, lid. A Mason Jar is an ideal container. Then add 1 tablespoon of inkAID Transferiez Concentrate. Place the lid on the jar and close tightly. It is also a good idea to place a sheet of plastic film over the top of the jar before placing the lid on. Allow to sit, agitating occasionally, for 4 hours to dissolve and form a clear, slightly viscous, solution. Label the container with the date. Use all of the Transferiez Transfer Solution within 2 or 3 days and don’t leave the lid off for more than a few seconds when working with it.
Only use 91% Isopropyl Alcohol. If you cannot find 91% Isopropyl Alcohol in your area you make your own using other concentrations of Isopropyl Alcohol.
- Prepare 4 fluid ounces of 91% Isopropyl Alcohol by mixing 2.89 fluid ounces (85.5 mls) of 99% Isopropyl Alcohol with 1.11 fluid ounces (32.794 mls) of 70% Isopropyl Alcohol.
- Prepare 4 fluid ounces of 91% Isopropyl Alcohol by mixing 0.44 fluid ounces (13 mls) of 99.5% Isopropyl Alcohol with 3.6 fluid ounces (105.294 mls) of 90% Isopropyl Alcohol.
Warning: Isopropyl Alcohol and Transferiez Solution are flammable. Store and use these products only in a well-ventilated area away from heat or ignition sources. Label and date all containers and store away from children and pets.
Handle with care. Spills are slippery. Store working brushes and tools in a tightly closed container with 91% Isopropyl Alcohol. DO NOT use this product with food utensils or store with food. Wear gloves for protection when using product.
Caution: Never pour Transferiez Solution down the drain. If it comes into contact with water a thick gel will result that will clog plumbing drains. To dispose of unused Transferiez Solution, pour it onto an absorbent material in a well-ventilated outdoor area and allow to dry completely. Dispose of the dried material with other solid waste. Leave the Transferiez Solution container open until completely dry and then discard, along with the dried brush. Do not attempt to wash and save used containers or brushes. Make sure they are completely dry and then discard.
Before you begin your first image transfer…
- Read and follow all instructions, caution and warning statements on the label and in this document.
- Make sure your work area is well-ventilated and do not work near a source of heat or ignition. Wear eye protection and gloves and, if you have a sensitivity to isopropyl alcohol, an appropriate respirator.
- Set up your work area on a smooth, level surface with a non-porous material on top such as a 10 mil thick high density polyethylene sheet available from home improvement stores. It’s an easy surface to clean and thick enough to last over many projects. You will also need a plastic cutting mat (available from local store) or carrier sheet (available from inkAID) cut to the appropriate size when working with porous substrates like paper, cheesecloth, canvas, or other fabrics.
- Make sure the surface of your image receptive substrate is clean. Remove any lint from your brushes with a taped lint remover.
- Make sure your receptive substrate is secured to your work surface. If necessary, tape it down on the back or front corners with a good quality blue painter’s tape.
- Have your printed inkAID Transfer Film ready to use.
- Start with small sized pieces to become familiar with the process and how the materials perform.
The printed film should remain on the substrate for no more than 2 or 3 minutes, then carefully roll back the film off of the substrate.
Refer to the “Instructional Videos” section of the inkAID website to watch demonstrations of image transfer to various substrates.
inkAID Transfer Inkjet Film is a premium inkjet film for transferring pigment ink jet prints to substrates using gels, such as Purell Hand Cleaner, and inkAID Transferiez Concentrate Transfer medium. inkAID Transfer Film is a 4 mil optically clear substrate that can be used with all printers using pigment based inks.
Only one side of inkAID Transfer Inkjet Film is coated for ink jet printing. The Transfer Film is packaged in plastic sleeves with a label clearly stating which side is the “image side”. If in doubt, slightly wet your finger and press it into a corner of the sheet. The coated side will be sticky.
inkAID Transfer Film loads into your printing like any other clear ink jet film media. Just be certain that you know which side of the film is the “image side”.
inkAID Transfer is a “gloss” media but many users choose a printer setting for media including “matte” in the description. When getting started, perform several test prints with different printer settings to see which is best for your work.
After placing the printed film onto the substrate you’re transferring the image to the film should remain on the substrate for no more than 2 or 3 minutes, then carefully roll back the film off of the substrate.
Refer to the “Instructional Videos” section of the inkAID website to watch demonstrations of image transfer to various substrates.
inkAID Transfer Film is a premium inkjet film for transferring pigment ink jet prints to substrates using gels, such as Purell Hand Cleaner, and inkAID Transferiez Concentrate Transfer medium. inkAID Transfer Film is a 4 mil optically clear substrate that can be used with all printers using pigment based inks.
Only one side of inkAID Transfer Inkjet Film is coated for ink jet printing. The Transfer Inkjet Film is packaged in plastic sleeves with a label clearly stating which side is the “image side”. If in doubt, slightly wet your finger and press it into a corner of the sheet. The coated side will be sticky.
inkAID Transfer Film loads into your printing like any other clear ink jet film media. Just be certain that you know which side of the film is the “image side”.
inkAID Transfer is a “gloss” media but many users choose a printer setting for media including “matte” in the description. When getting started, perform several test prints with different printer settings to see which is best for your work.
After placing the printed film onto the substrate you’re transferring the image to the film should remain on the substrate for no more than 2 or 3 minutes, then carefully roll back the film off of the substrate.
Refer to the “Instructional Videos” section of the inkAID website to watch demonstrations of image transfer to various substrates.
91% Isopropyl Alcohol (IPA) is needed to prepare the Transferieze Transfer Medium solution. If this is not available, click here for instructions to prepare 91% IPA from other IPA concentrations or with distilled water.